
Surface Preparation for Polyurethane-Coated Wood Paneling
Before you even think about slapping some paint on that wood paneling, you’ve gotta get it prepped. Polyurethane is tough stuff, designed to protect the wood, which means paint doesn’t stick to it easily. Proper prep work is key to a paint job that lasts and looks good. Trust me, skipping steps here will only lead to headaches later.
Initial Cleaning and Degreasing Protocol
First things first, you need to clean the paneling. Over time, wood paneling can accumulate all sorts of grime – dust, grease, maybe even some old sticky fingerprints. You can’t just paint over that stuff. Start by wiping down the paneling with a damp cloth to get rid of loose dust and dirt. Then, grab a degreasing cleaner. TSP (trisodium phosphate) is a classic choice, but it’s pretty strong, so wear gloves and eye protection. There are also TSP-free alternatives that work well and are a bit gentler. Make sure to follow the cleaner’s instructions, and rinse the paneling thoroughly with clean water afterward. Let it dry completely before moving on to the next step. This cleaning step is super important because it removes contaminants that can prevent the paint from adhering properly.
Abrasive Treatment for Enhanced Adhesion
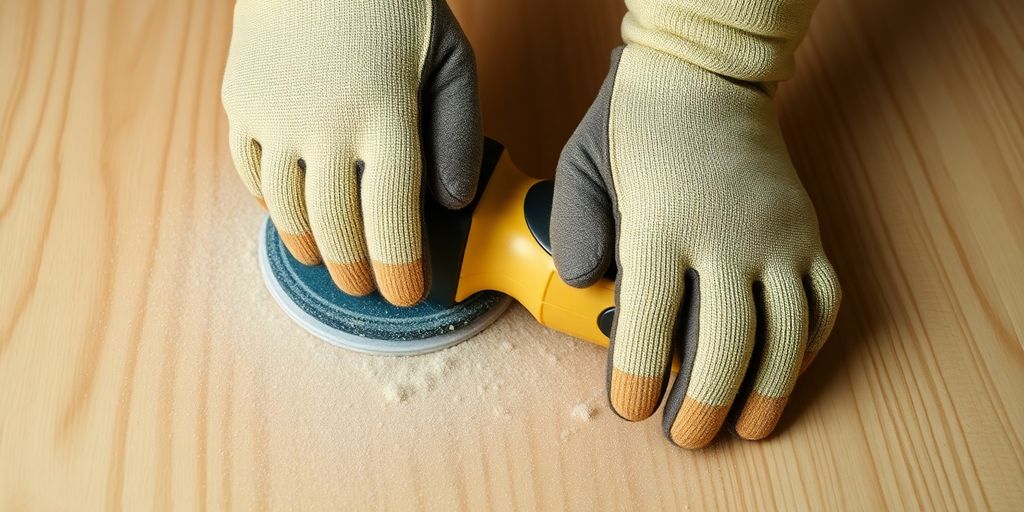
Polyurethane is slick, and paint needs something to grip onto. That’s where sanding comes in. You don’t need to go crazy and sand it down to bare wood, just enough to rough up the surface. Grab some fine-grit sandpaper (around 220-grit is good) and lightly sand the paneling. The goal is to create a slightly rough texture that the primer can grab onto. If you’re dealing with veneer paneling, be extra careful not to sand through the thin layer of wood. After sanding, wipe down the paneling with a tack cloth to remove all the sanding dust. This step is crucial for ensuring the primer adheres properly. Sanding creates tiny scratches that give the primer something to hold onto, resulting in a more durable paint job. Always wear a mask and goggles when sanding to protect yourself from dust.
Addressing Surface Imperfections
Now’s the time to deal with any imperfections in the paneling. Look for things like nail holes, dents, or cracks. If you want a smooth, seamless look, you’ll need to fill these in. Use a good quality wood filler or spackle to fill the imperfections. Apply it with a putty knife, making sure to overfill slightly. Once the filler is dry, sand it smooth with fine-grit sandpaper, blending it in with the surrounding paneling. Again, wipe away any dust with a tack cloth. If you’re keeping the paneling’s grooves, you might not need to do this step, but it’s worth considering if you have any major damage. Ignoring these imperfections can result in an uneven paint finish. Taking the time to fill and sand them will give you a much smoother and more professional-looking result. Plus, it prevents those imperfections from becoming more noticeable after painting.
Primer Selection and Application for Polyurethane Surfaces
So, you’ve prepped your wood paneling, and now it’s time to think about primer. This step is super important because polyurethane is slick stuff, and paint doesn’t always stick to it that well. Picking the right primer and putting it on the right way can make or break your whole paint job. Let’s get into it.
Optimal Primer Formulations for Polyurethane
Okay, so not all primers are created equal. When you’re dealing with polyurethane, you need something that’s going to grip that surface. Oil-based primers and shellac-based primers are usually your best bet. They’re known for sticking to glossy surfaces. Latex primers can work, but you really need to make sure you’ve sanded well and maybe even use a bonding agent to help it stick. Read the labels, do a little research, and don’t just grab the cheapest thing on the shelf. I’ve learned that lesson the hard way. Here’s a quick rundown:
- Oil-Based Primers: Great adhesion, but they take longer to dry and can be a pain to clean up (mineral spirits required).
- Shellac-Based Primers: Excellent adhesion, dry super fast, and block stains, but they can be brittle and smelly.
- Latex Primers: Easier to clean up (water!), but might not stick as well to polyurethane without proper prep.
Techniques for Uniform Primer Application
Alright, you’ve got your primer. Now, how do you put it on? The goal is to get a nice, even coat without drips or brush marks. I usually start by stirring the primer really well. Then, I use a good quality brush for the edges and corners and a roller for the big, flat parts. Don’t overload your brush or roller – thin coats are better than thick, gloppy ones. Overlap your strokes a little bit to avoid any missed spots. And for the love of all that is holy, don’t forget to “tip off” the primer. That means lightly running your brush over the wet primer in one direction to smooth out any roller stipple or brush marks. It makes a huge difference in the final look.
Considerations for Multiple Primer Coats
Sometimes, one coat of primer just isn’t enough, especially if you’re going from a dark color to a light color, or if your polyurethane is super glossy. If you can still see the old finish through the primer, or if the surface feels uneven, go ahead and put on a second coat. Just make sure the first coat is completely dry before you start. I usually wait at least 24 hours, just to be safe. And here’s a pro tip: lightly sand the first coat of primer with fine-grit sandpaper (220-grit or higher) before you put on the second coat. This will help smooth out any imperfections and give the second coat something to really grab onto. Trust me, it’s worth the extra effort.
Paint Product Specification for Polyurethane-Treated Substrates
Comparative Analysis of Latex and Oil-Based Paints
Okay, so you’ve prepped your wood paneling like a champ, and now it’s time to pick the actual paint. This is where things can get a little tricky because not all paints play nice with polyurethane. You’ve basically got two main contenders: latex and oil-based paints. Let’s break down the pros and cons of each so you can make the best choice for your project.
Latex paints are generally more user-friendly. They’re water-based, which means they’re easier to clean up (just soap and water!), they tend to have lower VOCs (volatile organic compounds), which is better for air quality, and they dry faster. However, latex paints might not adhere as well to polyurethane as oil-based paints, especially if the surface wasn’t prepped perfectly. You’ll definitely need a good primer, and maybe even two coats, to get solid adhesion and prevent the paint from peeling later on. Also, some cheaper latex paints can be a bit thin, requiring more coats for full coverage.
Oil-based paints, on the other hand, are known for their durability and excellent adhesion. They form a harder, more resistant finish, which is great for high-traffic areas or surfaces that might get bumped and scratched a lot. Oil-based paints also tend to level out nicely, minimizing brush strokes and giving you a smoother finish. The downside? They’re a pain to clean up (you’ll need mineral spirits), they have higher VOCs, and they take longer to dry. Plus, they can yellow over time, especially in areas with limited sunlight. If you go with oil-based paint, make sure you have good ventilation and wear a respirator.
Here’s a quick comparison table:
| Feature | Latex Paint | Oil-Based Paint |
|---|---|---|
| Clean Up | Soap and water | Mineral spirits |
| VOCs | Lower | Higher |
| Dry Time | Faster | Slower |
| Adhesion | Good (with proper prep) | Excellent |
| Durability | Good | Very Good |
| Yellowing | Minimal | Possible |
Selection of Appropriate Sheen Levels
Sheen refers to how much light the paint reflects, and it can dramatically affect the look and feel of your finished paneling. Choosing the right sheen isn’t just about aesthetics; it also impacts durability and how easy the surface is to clean. Here’s a rundown of the most common sheen levels and where they work best:
- Flat/Matte: This sheen has the least amount of shine. It’s great for hiding imperfections in the paneling because it doesn’t reflect light. However, it’s also the hardest to clean and not very durable, so it’s best for low-traffic areas like formal living rooms or bedrooms.
- Eggshell/Satin: These sheens have a slight sheen, like an eggshell or satin fabric. They’re more durable and easier to clean than flat paint, making them a good choice for living rooms, dining rooms, and hallways. They still hide imperfections pretty well, but they will show more than a flat finish.
- Semi-Gloss: This sheen is noticeably shinier and more reflective. It’s very durable and easy to clean, which makes it ideal for kitchens, bathrooms, and kids’ rooms. However, it will highlight any imperfections in the paneling, so make sure the surface is properly prepped and smooth before painting.
- Gloss: This is the shiniest and most reflective sheen. It’s extremely durable and easy to clean, but it’s also the most unforgiving when it comes to imperfections. Gloss paint is often used for trim, doors, and cabinets, but it’s generally not recommended for large expanses of paneling unless you’re going for a very specific, high-glam look.
When choosing a sheen, consider the following:
- The condition of your paneling: If it’s got lots of dents, dings, or unevenness, stick with a flatter sheen to minimize imperfections.
- The amount of traffic the area gets: High-traffic areas need more durable, easy-to-clean sheens like semi-gloss or satin.
- Your personal preference: Ultimately, the best sheen is the one you like the most! Get some samples and test them out in your space to see what looks best.
Pigment Opacity and Coverage Requirements
Opacity refers to how well a paint hides the color underneath it. High-opacity paints cover better, meaning you’ll need fewer coats to achieve a uniform finish. Coverage, on the other hand, refers to how much area a gallon of paint will cover. Both opacity and coverage are important factors to consider when choosing a paint, especially when painting over dark or stained wood paneling.
Generally, higher-quality paints have better opacity and coverage than cheaper paints. They use more pigment (the stuff that gives paint its color) and better binders (the stuff that holds the pigment together and helps the paint adhere to the surface). While they might cost more upfront, they can save you money in the long run because you’ll need fewer coats.
Here are some tips for ensuring adequate opacity and coverage:
- Choose a high-quality paint: Read reviews and look for paints that are specifically designed for covering dark colors or stains.
- Use a tinted primer: Tinting your primer to a color that’s close to your topcoat can significantly improve coverage.
- Apply multiple thin coats: It’s better to apply several thin coats of paint than one thick coat. Thick coats are more likely to drip, sag, and take longer to dry.
- Stir the paint thoroughly: Pigments can settle to the bottom of the can, so make sure to stir the paint well before each use.
- Consider the color: Some colors, like reds and yellows, are notoriously difficult to cover. You may need to apply extra coats or use a special primer designed for these colors.
By paying attention to pigment opacity and coverage requirements, you can avoid the frustration of endless coats of paint and achieve a beautiful, professional-looking finish on your wood paneling.
Methodologies for Paint Application on Paneling
Brush and Roller Application Techniques
Okay, so you’ve prepped the paneling and primed it like a boss. Now comes the fun part: actually painting! For most folks, the trusty brush and roller combo is the way to go. Using a good quality brush, especially one with synthetic bristles, is key for cutting in around edges and corners. You know, where the paneling meets the trim, ceiling, or floor. Take your time here; a steady hand makes all the difference. Then, grab a roller with a medium nap – that’s the fuzzy part – for the broad, flat surfaces. This helps get a nice, even coat without too much texture. Overlap your strokes a bit as you go, and don’t press too hard, or you’ll end up with drips and unevenness. Trust me, been there, done that. It’s also worth noting that the direction you roll in can affect the final look. Some people swear by following the grain of the wood, while others prefer going against it for better coverage. Experiment a little and see what works best for you.
Aerosol Application for Broad Surfaces
Alright, let’s talk spray paint. Now, I know what you’re thinking: spray paint is just for graffiti artists and quick touch-ups, right? Wrong! When it comes to painting large areas of paneling, especially if it has a lot of nooks and crannies, aerosol cans can be a lifesaver. The trick is to use a spray paint specifically designed for wood surfaces. These paints are formulated to adhere properly and provide a durable finish. Hold the can about 10-12 inches away from the paneling and use smooth, even strokes. Don’t just blast the paint on there; that’s a recipe for drips and runs. Instead, apply several thin coats, allowing each coat to dry completely before applying the next. This gives you better control over the coverage and helps prevent those dreaded drips. Also, make sure you’re working in a well-ventilated area, and wear a mask to protect yourself from the fumes. Seriously, those fumes are no joke.
Layering for Optimal Coverage and Finish
So, you’ve got your first coat of paint on the paneling, and it looks… okay. Don’t panic! That’s totally normal. The secret to a professional-looking paint job is layering. Think of it like building a cake: you wouldn’t just slap on one giant layer of frosting, would you? No, you’d apply several thin, even layers to get that smooth, delicious finish. Painting is the same deal. After your first coat is completely dry, lightly sand the surface with fine-grit sandpaper. This helps smooth out any imperfections and gives the next coat something to grip onto. Wipe away the sanding dust with a tack cloth, and then apply your second coat of paint. Depending on the color and the type of paint you’re using, you might even need a third coat. Just remember to let each coat dry completely before moving on to the next. And don’t rush the process! Patience is key to achieving that flawless, professional finish we’re all after.
Post-Painting Surface Treatment and Curing
Selection of Protective Sealants
Okay, so you’ve painted your wood paneling, and it looks pretty good. But you’re not done yet! Think of the sealant as the topcoat for your nails – it protects all your hard work. Choosing the right sealant is important. You’ve got a few options, but water-based polyurethane is often a good choice because it doesn’t smell as strong as other sealants and cleans up easily with water. Oil-based sealants are more durable, but they can yellow over time and require mineral spirits for cleanup. Consider the amount of foot traffic or general wear and tear the paneling will endure. For high-traffic areas, a more durable sealant might be worth the extra effort. Also, make sure the sealant is compatible with the type of paint you used. Usually, water-based paint works best with water-based sealants, and oil-based paint works best with oil-based sealants. Read the labels carefully to avoid any compatibility issues.
Application Protocols for Sealants
Applying sealant isn’t hard, but you have to do it right. First, make sure the painted surface is totally dry. I mean totally dry. Read the paint can for the recommended drying time, and maybe even give it an extra day just to be safe. Then, clean the surface to get rid of any dust or dirt. Use a tack cloth for this – it’s like a sticky cloth that picks up all the little particles. Apply the sealant in thin, even coats. Thick coats can lead to drips and uneven drying. Use a good-quality brush or a foam applicator. Apply the sealant in the same direction as the wood grain. Let each coat dry completely before applying the next one. You’ll probably need at least two coats, but three is even better for extra protection. Lightly sand between coats with fine-grit sandpaper (like 220-grit) to smooth out any imperfections and help the next coat adhere better. Wipe away the sanding dust with a tack cloth before applying the next coat.
Integration of Decorative Elements
Now for the fun part! Once the sealant is dry, you can add some decorative touches to really make your paneling pop. Think about adding trim work or crown molding around the top of the paneling. This can give it a more finished, polished look. You could also add decorative elements like sconces or artwork to the paneling. Just make sure to use the right kind of hardware for hanging things on wood paneling. Another idea is to paint the trim a different color than the paneling. This can create a nice contrast and add some visual interest. You could also add some stencils or decals to the paneling for a more unique look. Don’t be afraid to get creative and experiment with different ideas. The goal is to make the paneling look like it was always meant to be there, and not just something you slapped some paint on. And remember, have fun with it! It’s your space, so make it your own.
Conclusion
So, painting over wood paneling with polyurethane on it might seem like a big job. But, if you take it step by step, it’s totally doable. Just remember to clean everything really well, sand it down some, and use the right primer. Then, pick a good paint and put it on carefully. Doing these things will help make sure your new paint job looks good and lasts a long time. You can totally change how a room feels without spending a ton of money. It’s a pretty satisfying project when you see the finished result.


